Sealcoating is an important step in protecting asphalt surfaces on commercial properties. This application gives old or damaged parking lots and driveways a dark, fresh appearance and offers solid protection against chemicals, water penetration and UV rays.
Workers handling asphalt emulsion sealers must use long-sleeved shirts, pants, impervious gloves and shoes. Repeated contact with these materials can cause skin irritation. Visit Website to learn more.
Sealcoating is a cost-effective, time-saving measure that helps property managers protect asphalt surfaces from damage and extend their lifespans. Whether your property has parking lots, asphalt driveways, a jogging path or other specialty surface, using an acrylic-based sealant is usually the best option. But before the application of sealcoat, the pavement must be cleaned properly and thoroughly to ensure its success.
Ideally, the surface to be sealed should have no weeds or vegetation, and all cracks, potholes, and severely damaged areas should be filled in. It is also a good idea to remove any tripping hazards, like gravel or loose stone, from the area to be sealed.
Once repairs have been completed, the pavement will be broom-swept and then power washed to make sure it is clean and free of oil, gas, mud, dust, and other debris that could prevent a successful sealcoat. The pavement will also be primed, if needed, to ensure that the sealer adheres to the blacktop.
Before any sealer is applied, workers should wear personal protective equipment (PPE) such as long sleeved shirts, pants, impervious boots and gloves, safety goggles, and a face mask to prevent exposure to fumes. These chemicals are flammable, and can release toxic fumes that cause burns if not handled correctly. People with lighter skin are more prone to burning and other irritation from these chemicals.
Workers should also read and follow the material safety data sheets provided by the sealer manufacturer. Different manufacturers use slightly different additives to modify the properties of the sealer, such as rubberizing or faster drying additives. Using too many of these additives can result in a product that is not as effective at protecting the surface from damage or adhering to it. Additionally, using a sand specification with too much sand (18 lb/gal) can compromise the sealer’s flexibility, durability, and chemical resistance. Lastly, the spray machine should be cleaned and disinfected at the end of the job to avoid any cross-contamination.
Prepare the Surface
The first step in any sealcoating job is to prepare the asphalt surface. This includes blowing away debris, removing car-related fluids from the pavement (oil, grease and gasoline) and cleaning the entire surface. This is important because any dirt left on the pavement will prevent the new coat from adhering to it, and this can make the finished product look patchy or inconsistent. Professional pavement contractors will use robust cleaning equipment, including blowers and rotary brooms. Linear cracks will be blown out and filled with hot rubberized crack filling compound to help them retain their integrity.
Once the asphalt is clean, it is time to set up for the application of the actual sealer. This involves blocking off the area with traffic cones, sawhorses and caution tape to keep pedestrians and vehicles out of the way. This is also the time to protect any areas that you do not want black sealer to get on, such as sidewalks, curbs, fire hydrants, lampposts and garage doors.
Before beginning the sealcoating process, it is also necessary to make sure that all the ingredients are in place. Refined coal tar and asphalt emulsion-based sealers are supplied as concentrates that need to be mixed with water, silica sand and additives to achieve proper application consistency per the manufacturer’s recommendations. This step also involves reading and understanding the material safety data sheet and detailed application specifications.
In most cases, it is best to apply the sealer during a dry period, and this is why it’s essential to carefully check the weather forecast before starting any preparations. The ideal conditions for applying sealer include temperatures of 60 degrees or higher, no more than a 40% chance of rain and a clear sky.
It is also important to have all the equipment required to perform the job before starting, which will include a filter pot, sprayer and a hand squeegee. The filter pot will have a special valve that allows the user to control the flow of the sealer, so the correct amount can be applied to each square foot. The sprayer will need to have a long extension to reach the entirety of the parking lot and should be capable of achieving a minimum of one-eighth inch coverage.
Stage the Barrel
When applying a new coat of sealcoating, it is important to use the proper equipment for the job. This includes a high-quality sprayer that is easy to operate and that has been properly cleaned. It is also important to offer employees sufficient personal protective equipment (PPE). This should include a helmet, safety glasses, face masks and disposable coveralls. The right PPE will help to keep workers safe from hazardous materials while they are working on a project. It will also help to protect them from the harmful fumes that can be released while the sealcoating is drying. International Enviroguard offers a wide selection of affordable and comfortable sealcoating PPE that is available for purchase online.
Before you can apply any type of sealcoating, it is important to prepare the barrel. This can be done by filling the barrel halfway with water, swishing it around and then emptying it completely. This process helps to remove any small charred debris that is stuck inside of the barrel. It is also necessary to cure the barrel – this means allowing it to sit full of water for several days.
A barrel is a large, bulging cylindrical container made from wood staves hooped together. It is typically lined with copper or brass and has flat, parallel ends. A barrel can be made by hand or is a product of a craft known as cooperage, which dates back to ancient Europe. Barrels are used for storing liquids such as wine, beer and petroleum products. A barrel’s shape is designed to bulge in the center, which makes it relatively easy to roll when moving. The ends are secured with iron hoop rings called bungs. The bungs are covered with wax, which is often melted, to seal the barrel.
If you want to start a business in the sealcoating industry, it is best to invest in a professionally built rig that will provide the best results for your customers. Before spending a lot of money on building a rig, you should check out a website called Pave Market-they have a section dedicated to used sealcoating rigs for sale. You can find some amazing deals and save a ton of money by buying a pre-built rig.
Apply the Coat
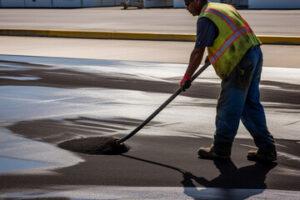
Once the surface is prepped, workers can begin applying the seal coat. This can be done by spraying a thick layer over the entire area, or by applying it manually with squeegees and thick nap rollers. It is important to apply the seal coat evenly and in a dense layer, as this is what will protect the asphalt from future damage.
Some experts recommend having a layer of sealcoat applied every few years to extend the lifespan of asphalt pavement. Although this is not a cheap process, it can save you thousands in costly repairs, including potholes and asphalt overlays.
Professionals often recommend spring or fall as the best time to get your driveway or parking lot seal coated, as these seasons allow for ample dry and non-rainy days for the coating to set properly. If you skip this step, the sun’s UV rays will quickly damage the pavement and cause it to crack and crumble.
In addition to repairing existing pavement cracks, the seal coat will enhance the appearance of the asphalt and make it look new again. This process is an excellent way to add value and curb appeal to your property.
Before the final application of the seal coat, professionals will typically flash heat any oil or gasoline stains that have formed on the asphalt. This is because these stains contain petroleum products, which can bond with and damage the newly applied seal coat.
After the surface is free from any petroleum stains, the last step of the application process involves using a long-handled paint roller to spread the seal coat. A squeegee can also be used to help get the coat into all corners and crevices, which is particularly useful in filling in any linear asphalt cracks.
Depending on the type of seal coat used, it may take between 24 and 48 hours for the pavement to be ready for vehicles. In the meantime, it is a good idea to cover any areas where vehicles are likely to park with tarps to prevent the newly applied material from being displaced or damaged by traffic and weather conditions.